在ASP.NET MVC Web API中使用Apworks开发第一个HTTP服务
在ASP.NET MVC Web API中使用Apworks开发第一个HTTP服务
上周我发布了Apworks框架的最新版本,打算写点文章来介绍如何在实际项目中使用Apworks进行开发。今天先简单写一点东西,首先说明一下,Apworks本身是面向领域驱动的一套开发框架,因此,领域模型的分析和建立就是使用Apworks的重点;然而,在大家对Apworks还没有任何了解的基础上,我暂时先抛开领域模型的建立,先向大家展示一下,如何使用Apworks开发第一个可以运行的程序。在这篇文章的介绍中,我们的领域模型只有一个聚合:日记(Note),而且我们会将这个聚合对象同时用作数据传输对象,这当然与DDD的宗旨是违背的,但为了简化介绍过程,我们也不把问题复杂化了。现在,就让我们一起来创建一个对“日记”信息进行维护的ASP.NET MVC Web API应用程序吧。
通过本文的介绍,你将了解到:
- Apworks下领域模型的建立
- Apworks框架的初始化
- 使用基于Entity Framework的仓储实现聚合维护
新建ASP.NET MVC Web API项目
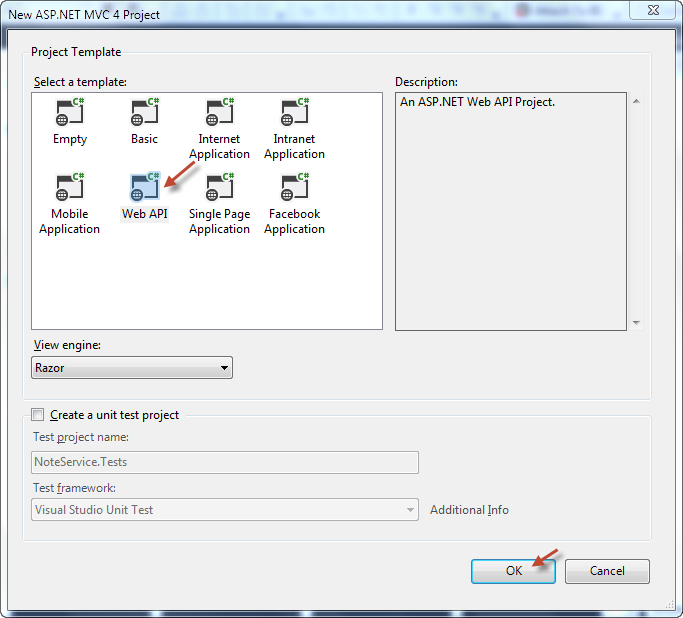
首先,新建一个ASP.NET MVC Web API项目,这个过程很简单,打开Visual Studio,然后新建一个ASP.NET MVC 4 Web Application,取名为NoteService(姑且取这个名字吧),然后在New ASP.NET MVC 4 Project对话框中,选择Web API模板,然后直接单击OK按钮:
在完成解决方案的创建以后,在Solution Explorer(解决方案资源管理器)中,可以看到标准的Web API目录结构:
创建领域模型
再次声明,虽然接下来的步骤会在NoteService的Models目录下新建领域模型,但Models目录本身是用来定义View Model的,作为领域模型,定义在另一个单独的程序集中会更合适。总之,需要对领域模型(Domain Model)和视图模型(View Model)进行区分。
首先,在NoteService项目上单击右键,选择Manage NuGet Packages菜单,在弹出的对话框中,搜索Apworks,然后选择Apworks,单击Install按钮:
接下来,在项目的Models目录上点右键,选择“Add –> Class”菜单,创建一个类,将类保存成Note.cs文件,并在文件中输入以下代码:
|
1
2
3
4
5
6
7
8
9
10
11
12
13
14
15
16
17
18
19
|
usingApworks;
usingSystem;
namespaceNoteService.Models
{
publicenumWeather
{
Cloudy, Rainy, Sunny, Windy
}
publicclassNote : IAggregateRoot
{
publicGuid ID { get; set; }
publicstringTitle { get; set; }
publicstringContent { get; set; }
publicDateTime CreatedDate { get; set; }
publicWeather Weather { get; set; }
}
}
|
行了,目前我们就只创建一个聚合:Note。从上面的代码得知,聚合的根需要继承于IAggregateRoot接口。
使用Unity作为IoC容器
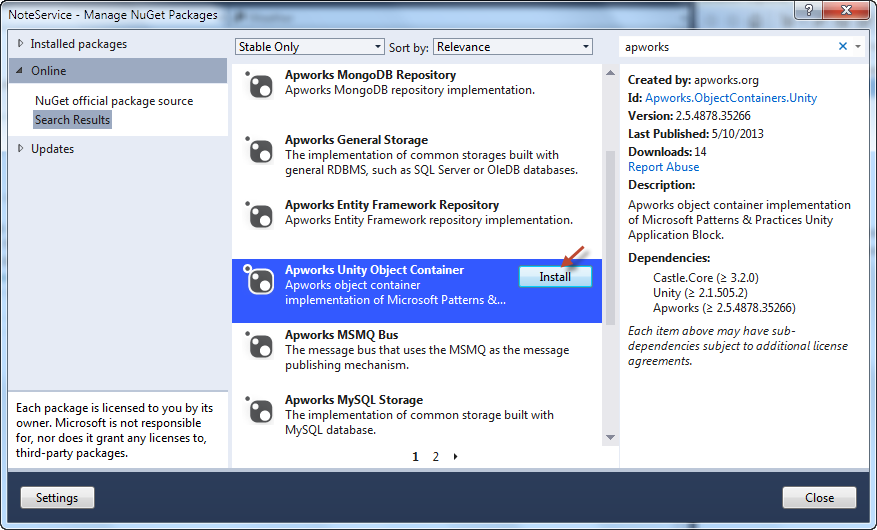
Apworks目前仅集成了Unity作为整个框架的IoC容器,因此,我们需要为Unity的使用作准备。同样,打开Manage NuGet Packages对话框,从中选择Apworks Unity Object Container,然后点击Install安装。注意:此时NuGet会把所依赖的Unity也一并安装:
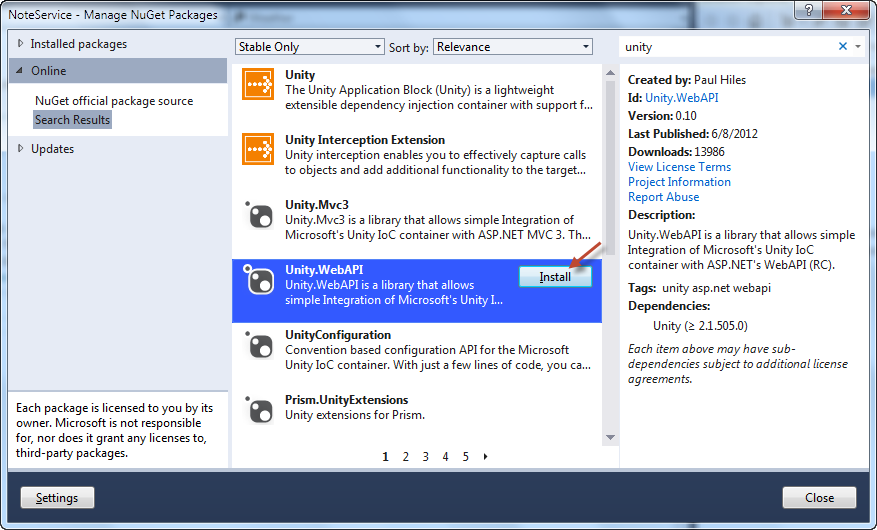
另外,我们还需要添加对Unity.WebAPI组件的引用,该组件提供了Unity对WebAPI的集成,以便能够在WebAPI中更好地使用Unity。用同样的方法添加引用:
OK,使用Unity的准备工作已经完成了,接下来,我们对Apworks进行配置。
配置Apworks框架
Apworks框架提供三种配置方式:app/web.config、直接写代码配置(使用RegluarConfigSource类),以及Fluent Interface。为应用框架提供多样化的配置方式,这是框架架构中必不可少的工作,究其原因和实现方式,请参考我以前写的一篇文章:《.NET应用框架架构设计实践 - 为应用程序框架提供多样化的配置方式》。Fluent Interface这种配置方式的实现,请参考我前面写的文章:《在C#中使用装饰器模式和扩展方法实现Fluent Interface》。下面言归正传。
打开Global.asax.cs文件,首先添加对Apworks.Application、Apworks.Config.Fluent、Microsoft.Practices.Unity和Unity.WebApi这几个命名空间的引用,然后在Application_Start中添加以下代码:
|
1
2
3
4
5
6
7
8
9
|
AppRuntime.Instance
.ConfigureApworks()
.UsingUnityContainerWithDefaultSettings()
.Create((sender, e) =>
{
var container = e.ObjectContainer.GetWrappedContainer<UnityContainer>();
// TODO: register types
GlobalConfiguration.Configuration.DependencyResolver = newUnityDependencyResolver(container);
}).Start();
|
上面代码应该非常清晰地表述了配置内容,我也就不多解释了,在应用中可以使用IntelliSense来了解一下Apworks Fluent Interface还实现了哪些配置项目。
使用基于Entity Framework的仓储
以同样的方法,引入Apworks Entity Framework Repository组件:
在NoteService项目上新建一个类,取名为NoteServiceDbContext,该类实现如下:
|
1
2
3
4
5
6
7
8
9
10
11
12
13
14
15
16
|
publicclassNoteServiceDbContext : DbContext
{
publicNoteServiceDbContext()
: base("NoteServiceDB") { }
publicDbSet<Note> Notes { get; set; }
protectedoverridevoidOnModelCreating(DbModelBuilder modelBuilder)
{
modelBuilder.Entity<Note>()
.HasKey(p => p.ID)
.Property(p => p.ID)
.HasDatabaseGeneratedOption(DatabaseGeneratedOption.Identity);
base.OnModelCreating(modelBuilder);
}
}
|
另外,为了能在第一次创建数据库时,加入一些样本数据作为测试,我还添加了以下类:
|
1
2
3
4
5
6
7
8
9
10
11
12
13
14
15
16
17
18
19
20
21
22
23
|
publicclassNoteServiceInitializer : DropCreateDatabaseIfModelChanges<NoteServiceDbContext>
{
protectedoverridevoidSeed(NoteServiceDbContext context)
{
newList<Note>
{
newNote
{
Title = "My first note",
Content = "This is my first note.",
CreatedDate = DateTime.Now,
Weather = Weather.Sunny
},
newNote
{
Title = "My second note",
Content = "This is my second note.",
CreatedDate = DateTime.Now,
Weather = Weather.Windy
}
}.ForEach(p => context.Notes.Add(p));
}
}
|
好了,Entity Framework的准备已经做好,接下来就是几个常规的配置项。
首先,修改web.config文件,将Entity Framework的数据库连接配置加上:
|
1
2
3
4
5
6
7
|
<entityFramework>
<defaultConnectionFactorytype="System.Data.Entity.Infrastructure.SqlConnectionFactory, EntityFramework">
<parameters>
<parametervalue="Data Source=(LocalDb)\v11.0; Initial Catalog=NoetServiceDB; Integrated Security=True; Connect Timeout=120; MultipleActiveResultSets=True; AttachDBFilename=|DataDirectory|\NoteServiceDB.mdf"/>
</parameters>
</defaultConnectionFactory>
</entityFramework>
|
然后,打开Global.asax.cs文件,将Application_Start方法修改成:
|
1
2
3
4
5
6
7
8
9
10
11
12
13
14
15
16
17
18
19
20
21
22
23
24
25
26
|
protectedvoidApplication_Start()
{
AreaRegistration.RegisterAllAreas();
WebApiConfig.Register(GlobalConfiguration.Configuration);
FilterConfig.RegisterGlobalFilters(GlobalFilters.Filters);
RouteConfig.RegisterRoutes(RouteTable.Routes);
BundleConfig.RegisterBundles(BundleTable.Bundles);
// Initialize database
Database.SetInitializer<NoteServiceDbContext>(newNoteServiceInitializer());
AppRuntime.Instance
.ConfigureApworks()
.UsingUnityContainerWithDefaultSettings()
.Create((sender, e) =>
{
var container = e.ObjectContainer.GetWrappedContainer<UnityContainer>();
// TODO: register types
container.RegisterInstance<NoteServiceDbContext>(newNoteServiceDbContext(), newPerResolveLifetimeManager())
.RegisterType<IRepositoryContext, EntityFrameworkRepositoryContext>(newHierarchicalLifetimeManager(),
newInjectionConstructor(newResolvedParameter<NoteServiceDbContext>()))
.RegisterType(typeof(IRepository<>), typeof(EntityFrameworkRepository<>));
GlobalConfiguration.Configuration.DependencyResolver = newUnityDependencyResolver(container);
}).Start();
}
|
这部分代码中,改动的地方是:1、使用Database.SetInitializer方法,设置EF的数据库初始化策略,我们使用已经编写好的NoteServiceInitializer作为初始化策略;2、在Create的委托方法中,我们添加了对IRepositoryContext、IRepository<>以及NoteServiceDbContext的类型注册,以使用Entity Framework Repository。注意:IRepositoryContext被注册为HierarchicalLifetimeManager生命周期,以便Unity能够在Request结束时能够正确调用IRepositoryContext的Dispose方法。详细请参见:http://devtrends.co.uk/blog/introducing-the-unity.webapi-nuget-package。
开发Web API服务
在Solution Explorer(解决方案资源管理器)中,将ValuesController改名为NotesController,然后,改写NotesController类如下:
|
1
2
3
4
5
6
7
8
9
10
11
12
13
14
15
16
17
18
19
20
21
22
23
24
25
26
27
28
29
30
31
32
33
34
35
36
37
38
39
40
41
42
43
44
45
46
47
48
49
50
51
52
53
54
55
56
57
|
usingApworks.Repositories;
usingNoteService.Models;
usingSystem;
usingSystem.Collections.Generic;
usingSystem.Web.Http;
namespaceNoteService.Controllers
{
publicclassNotesController : ApiController
{
readonlyIRepository<Note> noteRepository;
publicNotesController(IRepository<Note> noteRepository)
{
this.noteRepository = noteRepository;
}
// GET api/notes
publicIEnumerable<Note> Get()
{
returnnoteRepository.FindAll();
}
// GET api/notes/6EE246A5-9E68-4BC9-BA24-7F4EC2B326D4
publicNote Get(Guid id)
{
returnnoteRepository.GetByKey(id);
}
// POST api/notes
publicvoidPost([FromBody]Note value)
{
noteRepository.Add(value);
noteRepository.Context.Commit();
}
// PUT api/notes/6EE246A5-9E68-4BC9-BA24-7F4EC2B326D4
publicvoidPut(Guid id, [FromBody]Note value)
{
var note = noteRepository.GetByKey(id);
note.Title = value.Title;
note.Content = value.Content;
note.CreatedDate = value.CreatedDate;
note.Weather = value.Weather;
noteRepository.Update(note);
noteRepository.Context.Commit();
}
// DELETE api/notes/6EE246A5-9E68-4BC9-BA24-7F4EC2B326D4
publicvoidDelete(Guid id)
{
var note = noteRepository.GetByKey(id);
noteRepository.Remove(note);
noteRepository.Context.Commit();
}
}
}
|
OK,至此,一个使用Apworks开发的ASP.NET MVC Web API服务已经完成,由于DependencyResolver的使用,NotesController在被创建时会获得IRepository<Note>的实例(由IoC通过构造函数注入),于是,在每个方法调用中,都能使用Note仓储完成所需的操作。
测试
我们可以使用Microsoft ASP.NET Web API Client Libraries对开发的Web API服务进行测试,具体用法也就不说了,可以自行参阅网上的文章。例如:可以用以下方法测试GET请求:
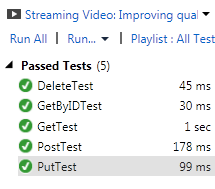